The static progressive elbow flexion orthosis is commonly used to treat elbow stiffness and limitations in passive range of motion. The design may look complicated at first, but you can create it in about 10 steps. We highlight all of them in this practical step-by-step guide.
The elbow: a critical joint for function
Elbow stiffness, with limitations in active and passive range of motion, is a common complication of trauma, work injuries and/or sports injuries.
The elbow joint is a critical link between the upper arm and the forearm. It contributes to the positioning of the hand for all functional activities of daily living. Even minimal limitations in active and/or passive range of elbow motion, can impact a patient’s functional ability.
The role of orthotic fabrication
The treatment of stiff elbow joints is based on the viscoelastic nature of connective tissue and its ability to respond to tensile loading of the soft tissue.
Therapists can choose to fabricate:
- Static Progressive Orthoses
- Serial Static Orthoses
- Dynamic Orthoses
All types of orthoses can lead to positive outcomes. The evidence indicates that patients should wear the orthosis, as recommended, for up to a year or until the patients reach a plateau in gaining functional joint range of motion.
Static Progressive Elbow Flexion Orthosis: Step-by-Step Tutorial
Static Progressive Orthoses incorporate a variety of non-elastic outriggers. These help to place the stiff elbow joint in its maximum tolerable end range position. This means that the patient does not feel pain, but a tolerable low load tension. When possible, the patient can increase the tension on the stiff joint and place it in a new tolerable end range position.
Here are instructions for the fabrication of a static progressive orthosis to gain passive elbow flexion using hook and loop straps in 10 steps.
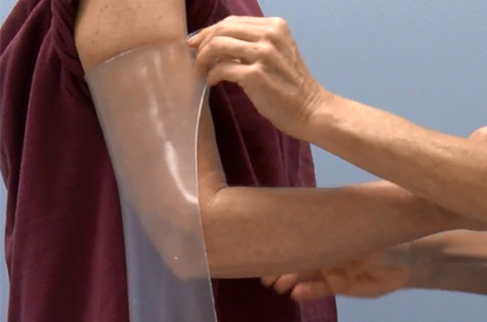
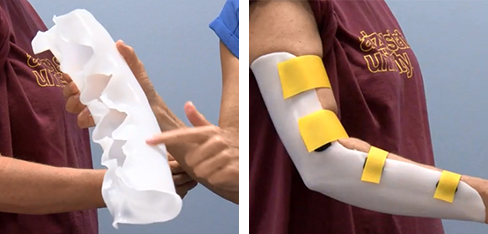
1. Create the base orthosis
Use a rectangle of Orfit NS or Aquafit (Orfit Natural NS) in 3.2 mm (1/8”) to fabricate a circumferential posterior-based elbow orthosis using the pinch method.
.
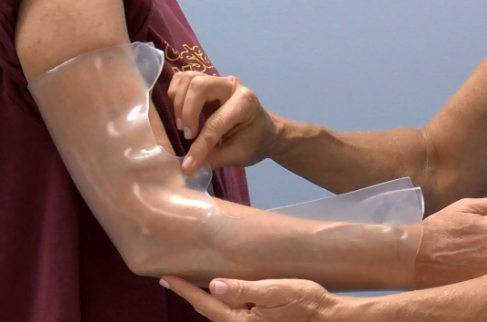
2. Finish the edges
Trim away excess material and pinches and apply straps.
3. Mark the elbow joint
Mark the elbow joint on the material with a line across the entire orthosis. Draw a perpendicular line, about 5 cm (2″) across the first line, on the lateral and medial sides. This will indicate how the orthosis should be put back together using Orficast hinges.
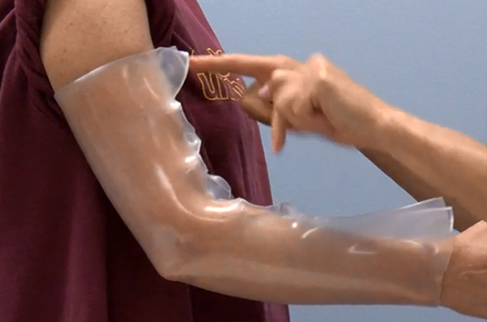
4. Create two parts
Cut the orthosis at the elbow joint into two parts: an upper arm component and a forearm component.
Trim the corners and smooth the edges.
5. Fabricate Orficast hinges
Prepare two hinges using Orficast 6 cm (2.5”) with a length of 7.5 cm (3”). Activate the Orficast in the splint pan and roll it tightly into tubes. Flatten the ends and trim for easier attachment.
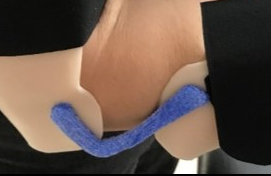
6. Attach the hinges to the elbow flexion orthosis
Scrape off the coating at the spots marked on the upper arm and forearm components. Using the heat gun, heat up both of these marked spots as well as the flattened ends of the Orficast hinges. Attach firmly together.
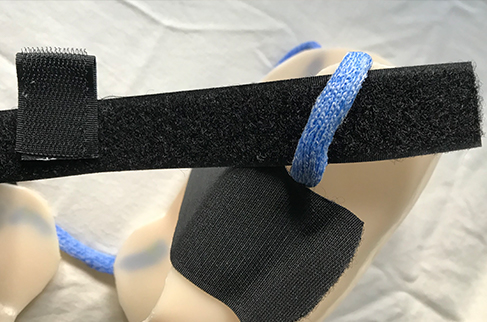
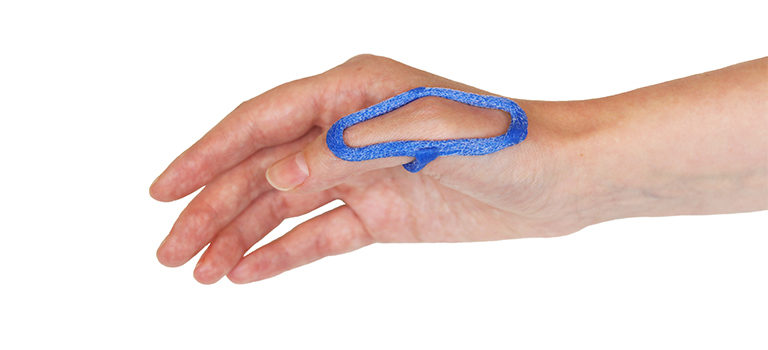
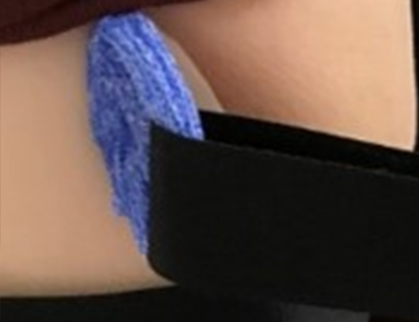
7. Create Orficast loops
Using two additional pieces of rolled Orficast 6 cm (2.5”), create loops and attach these to the upper arm component near the top strap.
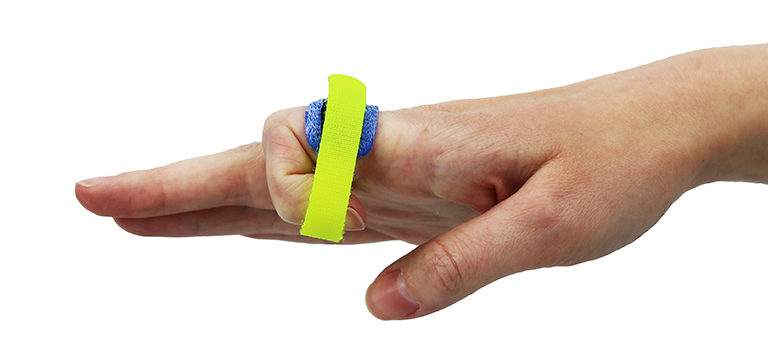
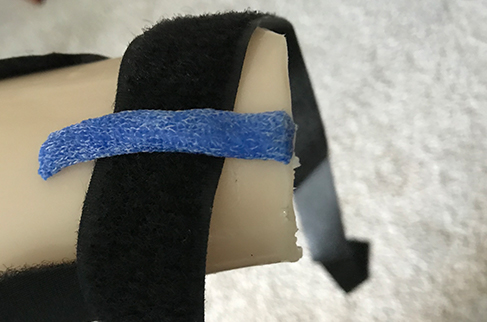
8. Attach the loop strap
Take a 1-1.5 m (4-5’) long piece of loop strap and attach the middle of it at the distal end of the forearm component, creating one strap on each side of the arm. The strapcan be attached directly to the orthosis in a few different ways:
- Sticking adhesive-backed hook to the orthosis
- Placing it through an additional Orficast loop
- Using dry heat
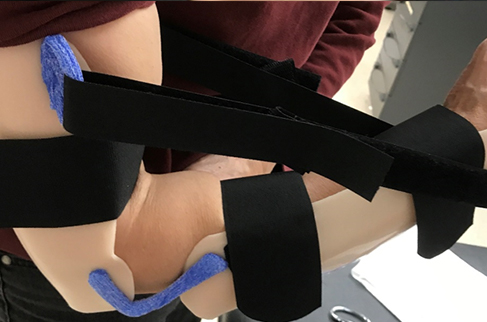
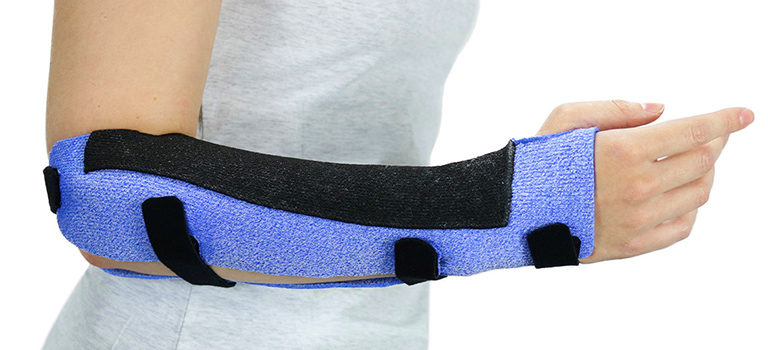
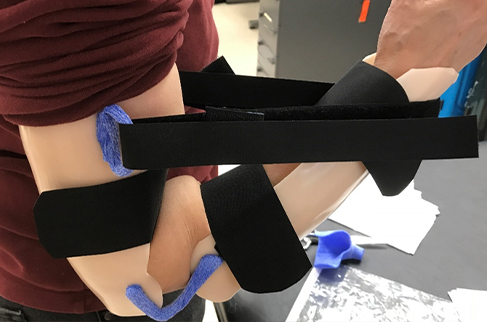
9. Fit the elbow flexion orthosis on the patient
The patient puts their arm into both components of the orthosis, strapping it securely on the upper arm and forearm. Then, each loop strap is threaded through the Orficast loop at the upper arm.
The loop strap is attached to itself with an adhesive-backed hook square. To make this square, take a rectangular piece of hook tape and fold it into itself to create hook on both sides.
.
10. Adjust the tension of the orthosis
Increase the tension on the elbow joint by pulling the long loop straps and moving the square of hook to lock in place. The tension should be enough so that the patient feels some tension, but not too much, so that the placement does not cause pain.
References:
Schwartz, D. A. (2012). Static progressive orthoses for the upper extremity: a comprehensive literature review. Hand, 7(1), 10-17.
Ulrich, S. D., Bonutti, P. M., Seyler, T. M., Marker, D. R., Morrey, B. F., & Mont, M. A. (2010). Restoring range of motion via stress relaxation and static progressive stretch in posttraumatic elbow contractures. Journal of shoulder and elbow surgery, 19(2), 196-201.
Veltman, E. S., Doornberg, J. N., Eygendaal, D., & van den Bekerom, M. P. (2015). Static progressive versus dynamic splinting for posttraumatic elbow stiffness: a systematic review of 232 patients. Archives of orthopaedic and trauma surgery, 135(5), 613-617.
Questions?
If you have a question or comment, please post it in the Orfit Splinting & Rehabilitation Group on Facebook, or send us a message.


Written by Debby Schwartz, OTD, OTR/L, CHT
Physical Rehabilitation Product and Educational Specialist at Orfit Industries America.
Debby is a certified hand therapist with over 36 years of clinical experience. She completed her Doctorate of Occupational Therapy at Rocky Mountain University of Health Professions in 2010. She has worked at Orfit Industries America as Product and Educational Specialist since 2007.
Debby is also an adjunct professor at the Occupational Therapy Department of Touro University, School of Health Sciences, and at the Occupational Therapy Department at Yeshiva University, Katz School of Science and Health in NYC. She has written many book chapters in the field of hand therapy and multiple articles for hand therapy journals, including the ASHT Times and the Journal of Hand Therapy. She has published a new textbook on orthotic fabrication together with Dr. Katherine Schofield, entitled “Orthotic Design and Fabrication for the Upper Extremity: A Practical Guide”.
Debby’s Google Scholar
If you’d like to receive the latest product updates and interesting Orfit news, subscribe to our newsletter: