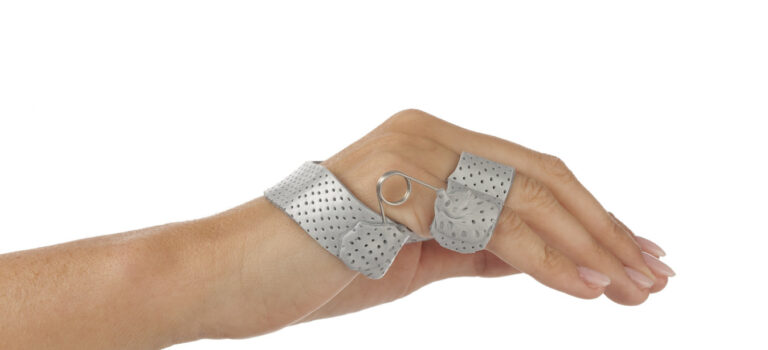
We created a Practical Guide to Finger Orthoses that covers five different orthoses for finger conditions using Orficast 3 cm (1”).
The smallest member of the Orficast family is a great product for the fabrication of a variety of finger orthoses. But did you ever stop to think about the simplicity of it? As a matter of fact, using only 20 cm (8”) of length of this product, you can fabricate various effective orthoses with simple designs!
In the Practical Guide to Finger Orthoses we will:
- Review five common clinical diagnoses seen by therapists everywhere.
- Describe the rationale for orthotic intervention.
- Provide fabrication instructions for easy orthotic designs.
Here’s a preview of one of the orthoses in the guide.
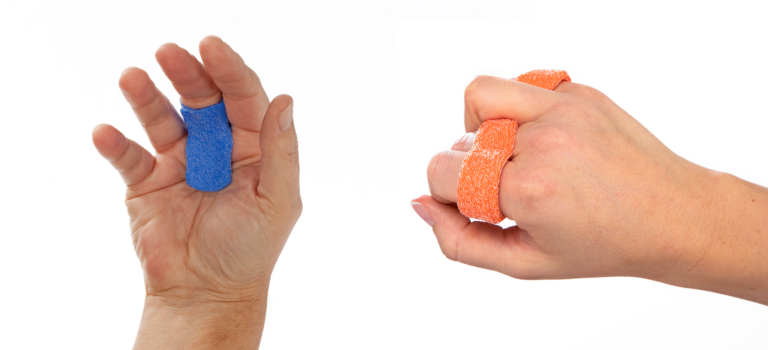
Buddy Tapes (for collateral ligament injuries)
The condition
The proximal interphalangeal (PIP) joint is the most commonly injured joint in the hand and highly susceptible to injury during athletic activities, especially in ball-handling sports.
Angular forces may cause a partial or a complete rupture in the collateral ligaments, and lateral dislocation can occur when combined with a volar plate rupture. In general, the PIP joint is prone to stiffness after injury, and if it is not properly diagnosed and treated, a permanent impairment of the hand function may result.
Why an orthosis works
Protective motion allows the PIP joint to move through its range of motion while keeping the joint stable. The goal is to restore motion as soon as possible to prevent stiffness and contracture. A common method used for most stable injuries is buddy strapping or taping.
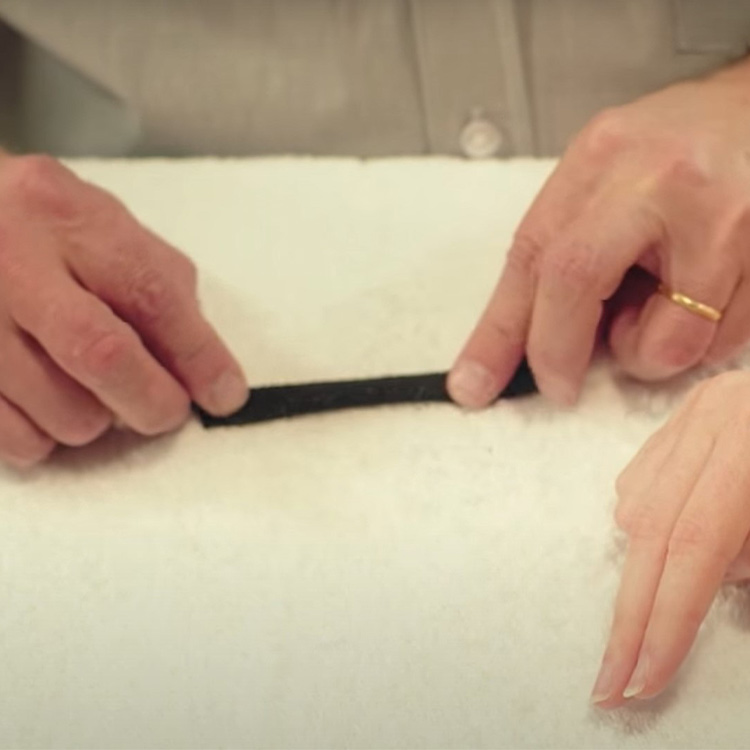
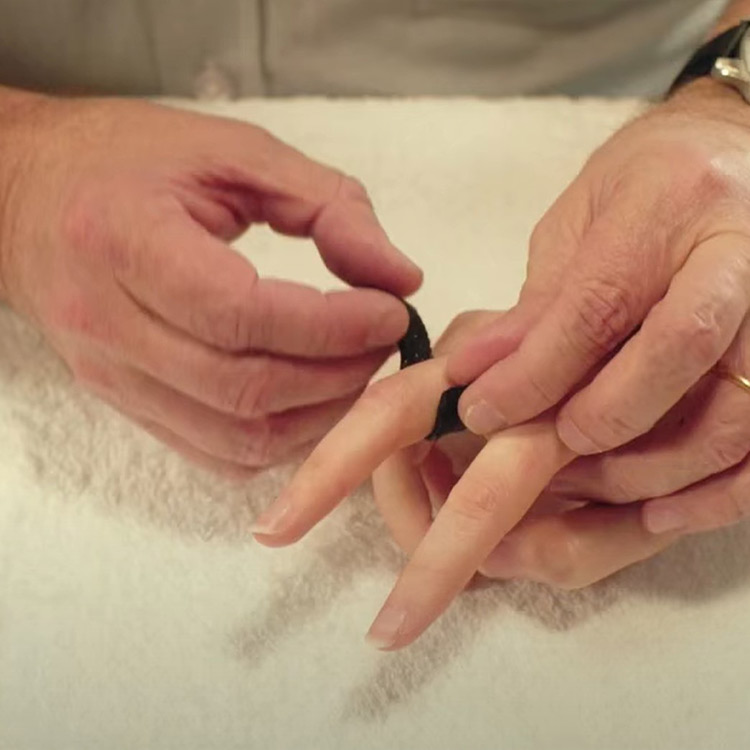
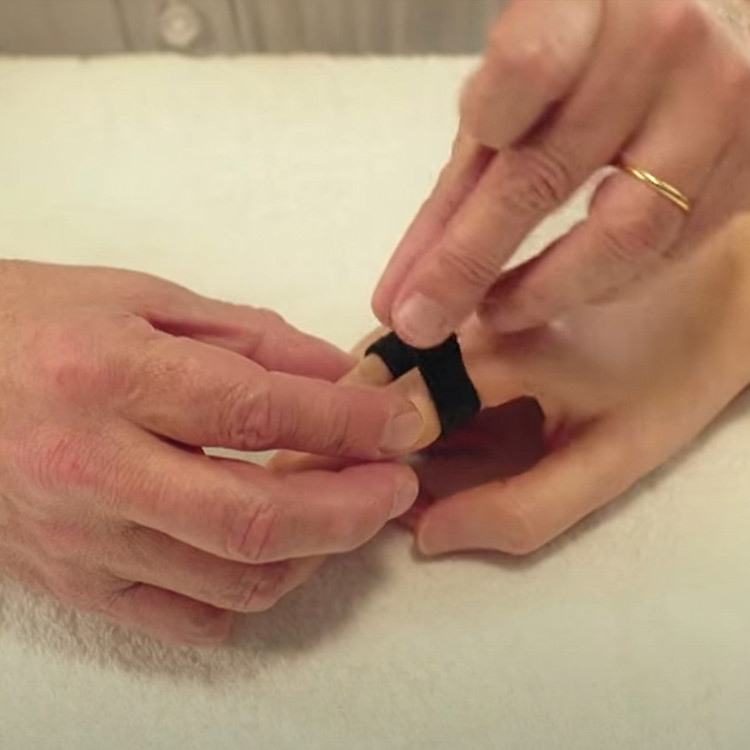
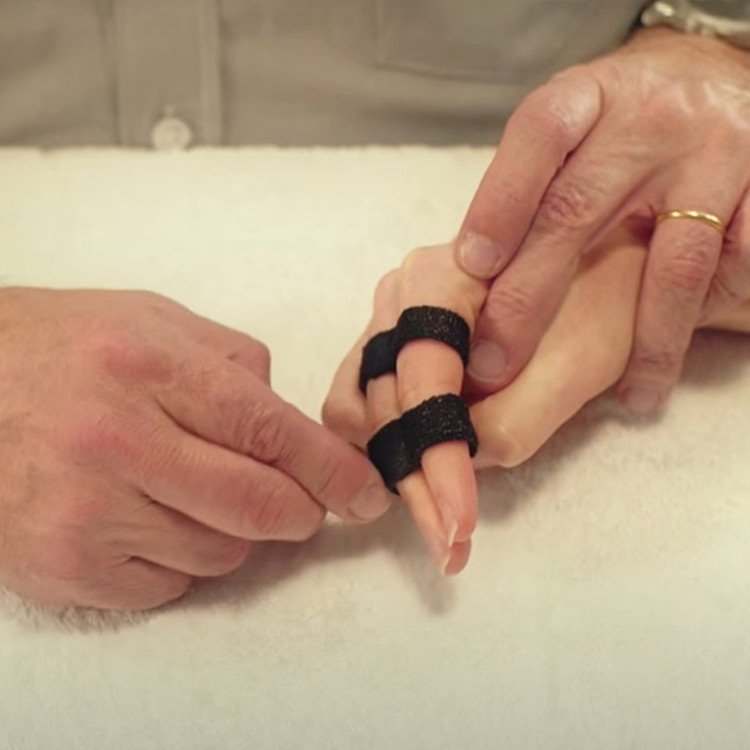
How to fabricate?
Step 1: Take two 20 cm (8″) long strips of Orficast 3 cm (1″). Fold the strips lengthwise after activation, or roll longitudinally.
Step 2: Wrap one strip proximally around the proximal phalanx of one finger and secure it to itself like a ring.
Step 3: Wrap the orthosis around the adjacent finger and secure it back to itself. It forms the shape of the number 8. Then, let it harden.
Step 4: Finally, repeat steps 3 and 4 with the second strip of Orficast. Position it across the middle phalanx so that the PIP joint is free between the two buddy tapes.
Download: Practical Guide to Finger Orthoses
Download the full Practical Guide to Finger Orthoses and learn about four additional finger orthoses using Orficast 3 cm (1″):


Written by Debby Schwartz, OTD, OTR/L, CHT
Physical Rehabilitation Product and Educational Specialist at Orfit Industries America.
Debby is a certified hand therapist with over 36 years of clinical experience. She completed her Doctorate of Occupational Therapy at Rocky Mountain University of Health Professions in 2010. She has worked at Orfit Industries America as Product and Educational Specialist since 2007.
Debby is also an adjunct professor at the Occupational Therapy Department of Touro University, School of Health Sciences, and at the Occupational Therapy Department at Yeshiva University, Katz School of Science and Health in NYC. She has written many book chapters in the field of hand therapy and multiple articles for hand therapy journals, including the ASHT Times and the Journal of Hand Therapy. She has published a new textbook on orthotic fabrication together with Dr. Katherine Schofield, entitled “Orthotic Design and Fabrication for the Upper Extremity: A Practical Guide”.
Debby’s Google Scholar