The
personal fit
personal fit
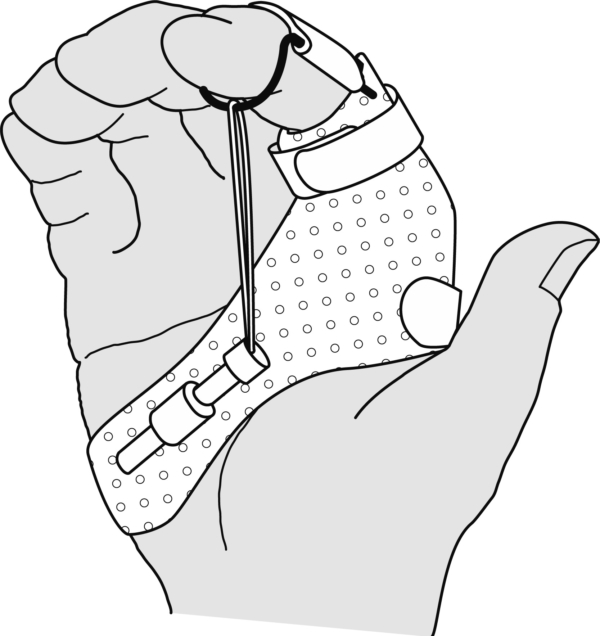
“GVV” swing traction splint
Objective
Passive mobilization of the PIP joint over a full range of motion.
Indications
- Joint stiffness
- Adhesion of the extensor hood mechanism
- Flexor tendon tenolysis and arthrolysis
Note: Design a wide pattern at PIP level to cover the joint axes totally.
Fabrication steps
Recommended products
ORFIT CLASSIC
ORFIT NS
AQUAFIT NS
ORFIT COLORS NS
ORFIT ECO (NS)
ORFILIGHT NS
ORFIT FLEX NS
TECNOFIT
ORFIBRACE NS
ORFIT NS
AQUAFIT NS
ORFIT COLORS NS
ORFIT ECO (NS)
ORFILIGHT NS
ORFIT FLEX NS
TECNOFIT
ORFIBRACE NS
Thickness mm (inches)
3,2 mm (1/8")
Perforation

Non Perforated
1.
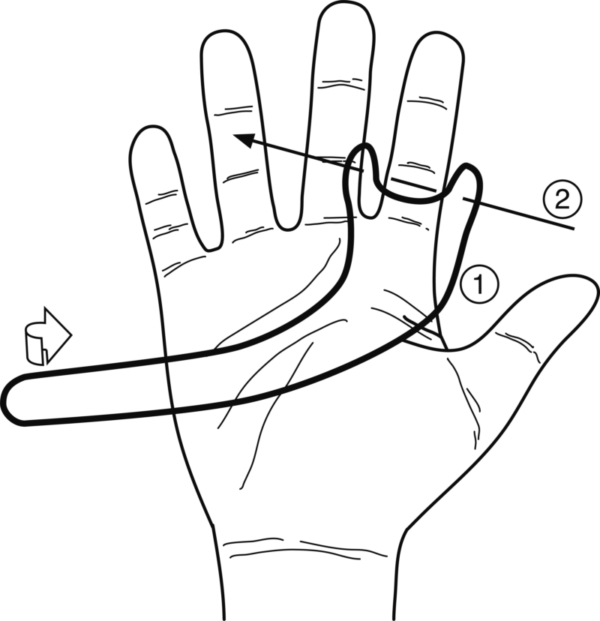
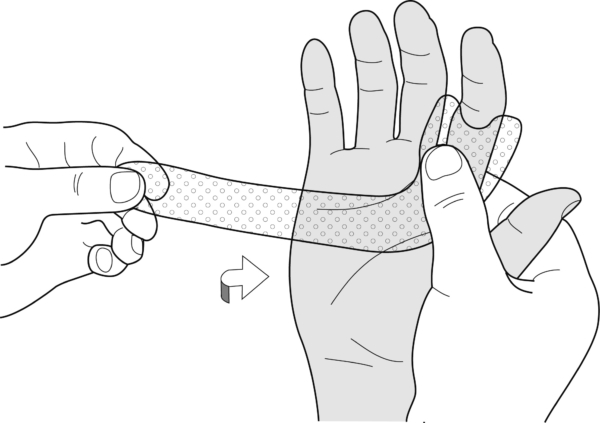
Stretch the ulnar portion and mould, dorsally, over the back of the hand back towards the index finger.
2.
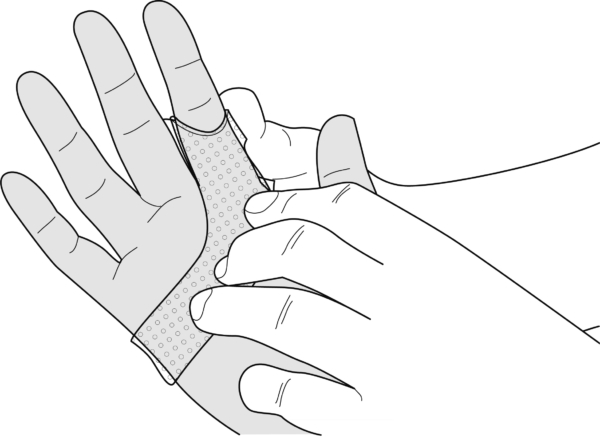
Overlap and stick together. Mark on the skin as well as on the splint the position of the PIP flexion axis.
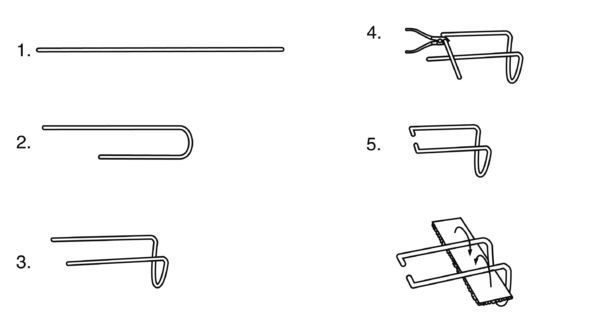
3.
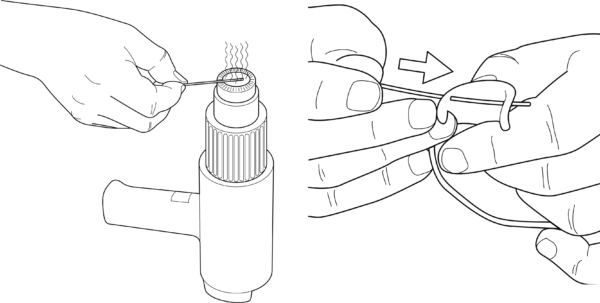
After the material has hardened, remove the splint. Heat the steel wire provided to make the ‘swing’, and pierce both sides where marked. Make sure to observe the alignment.
4.
Make up the swing with the help of pliers and cutters.
5.
- Make a small bridge at the distal end of the swing. Use self-adhesive loop tape for this purpose. Avoid too long a swing. Hook the swing into the splint.
- Position the swing until it touches the palmar support of the splint and stick an Orfitube right at this spot.
- Attach an elastic to the swing, bring it through the Orfitube and attach a knot.